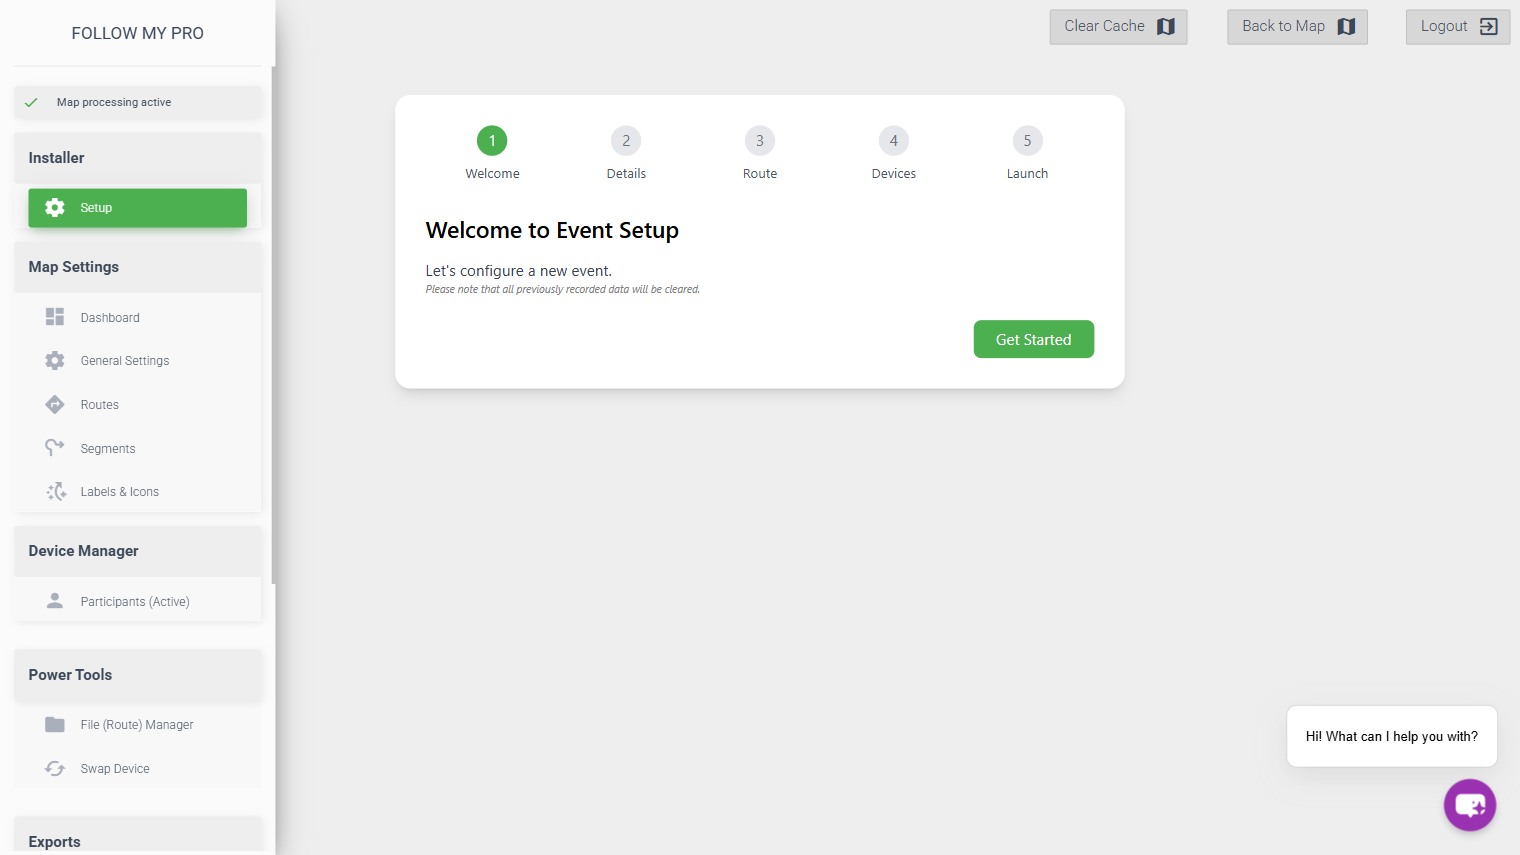
The event setup wizard allows you to quickly configure the map for a new event, importing the required data. It will clear all existing data within the map.
To begin, click “Get Started”.
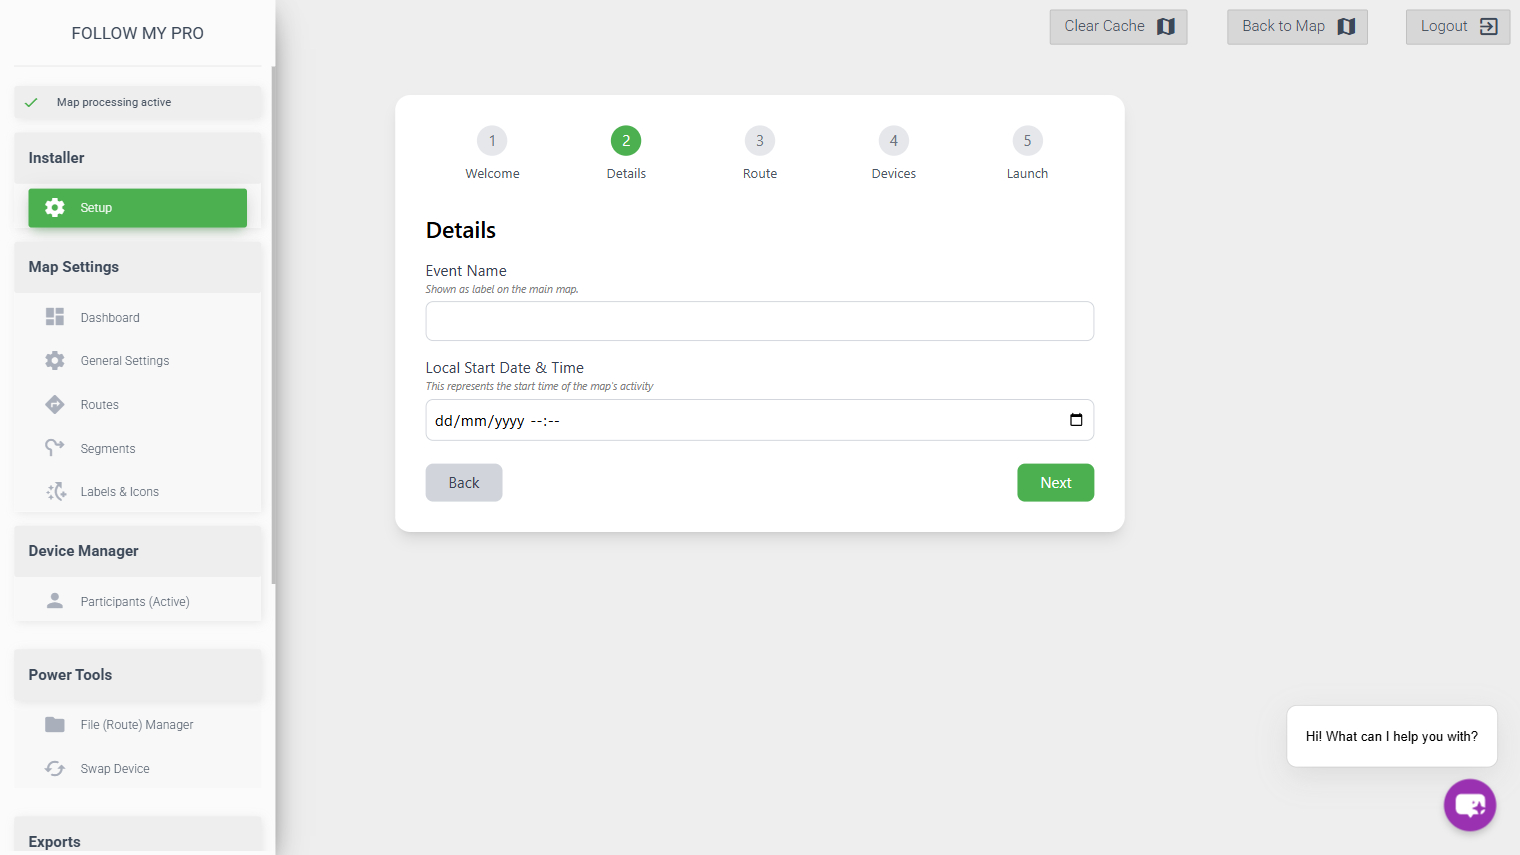
Details
Enter the name of the event and select start time and date. The time can be entered in local time, with the map determining the timezone based on the route location (uploaded on the following page).
This time will dictate when the map goes live, so if you would like to enable tracking before the event start then adjust the time accordingly.
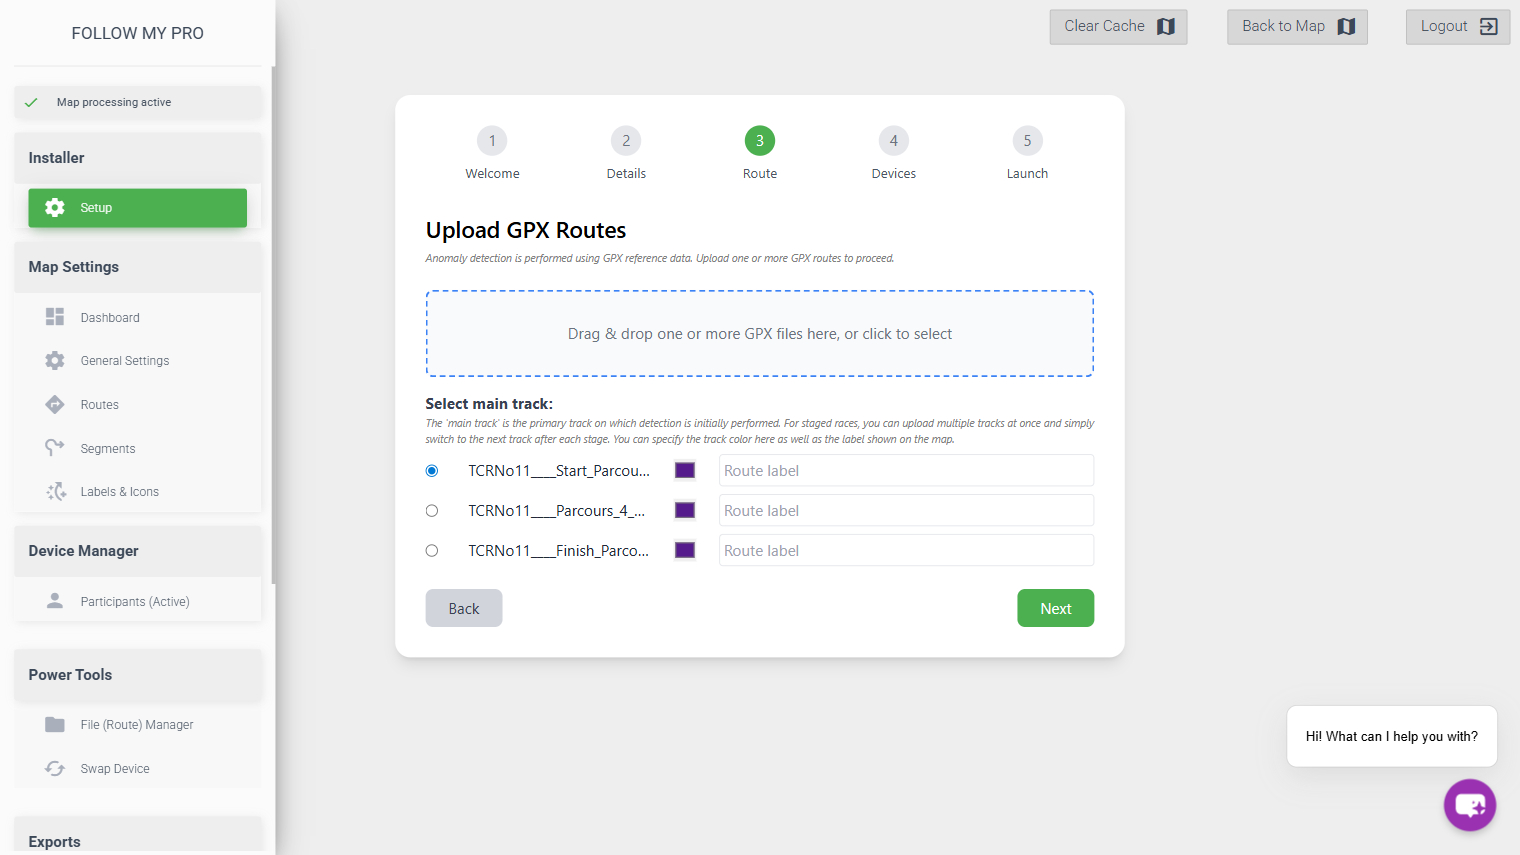
Route(s)
Upload the route(s) you would like on the map. These must be in GPX format and they are required for off-track detection to work correctly on the map.
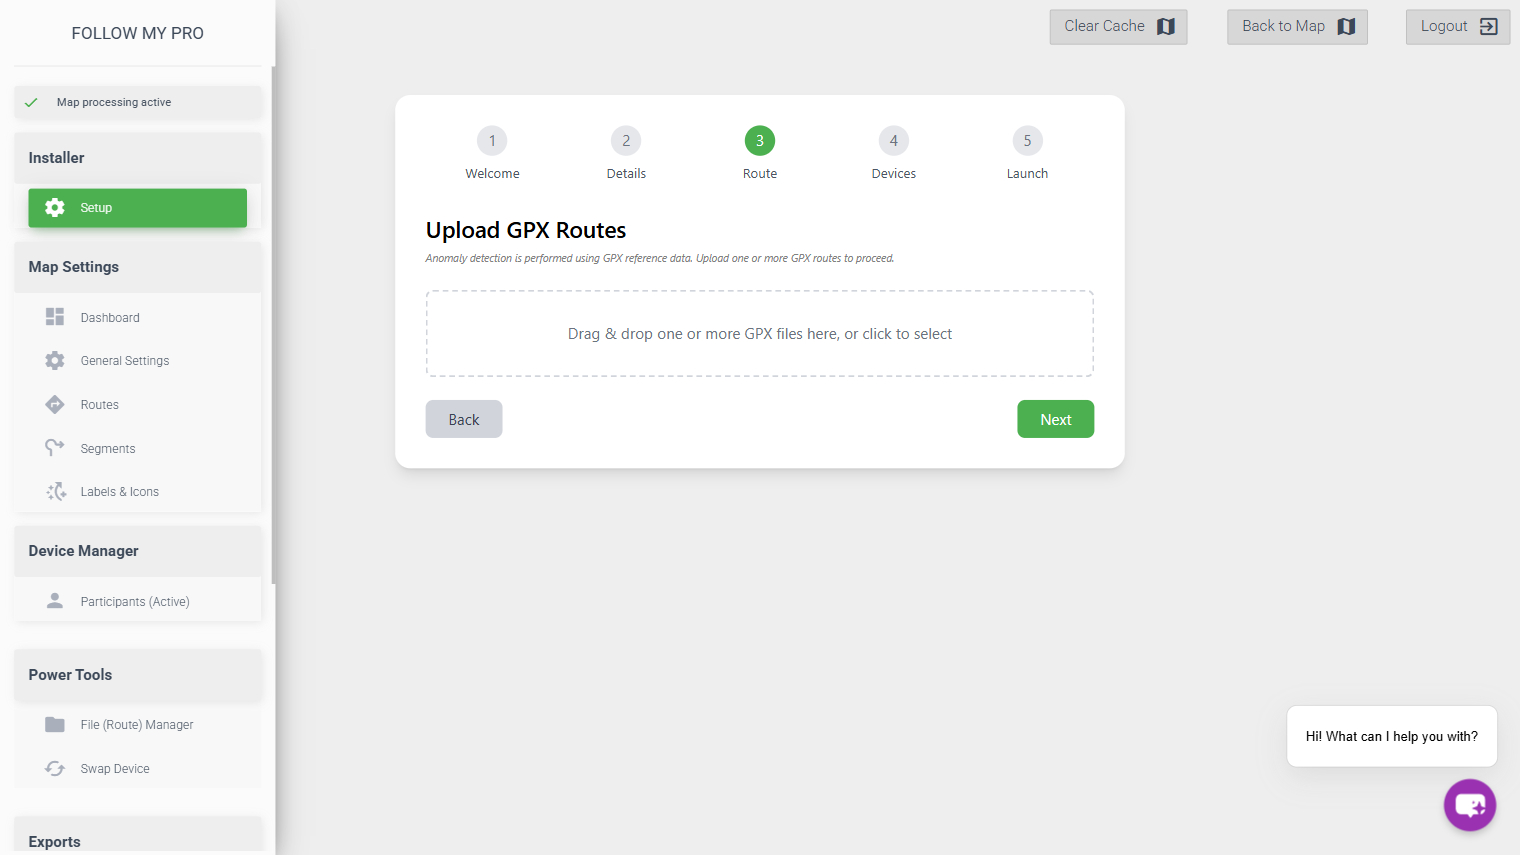
Once you have uploaded the route(s), you have the option to label and set the colour.
If you have multiple routes then it’s important that you select the main track correctly for the map start. With a stage race, you can load all routes at once and then switch the main track after the end of each stage. It is this route that will be used for off-track detection.
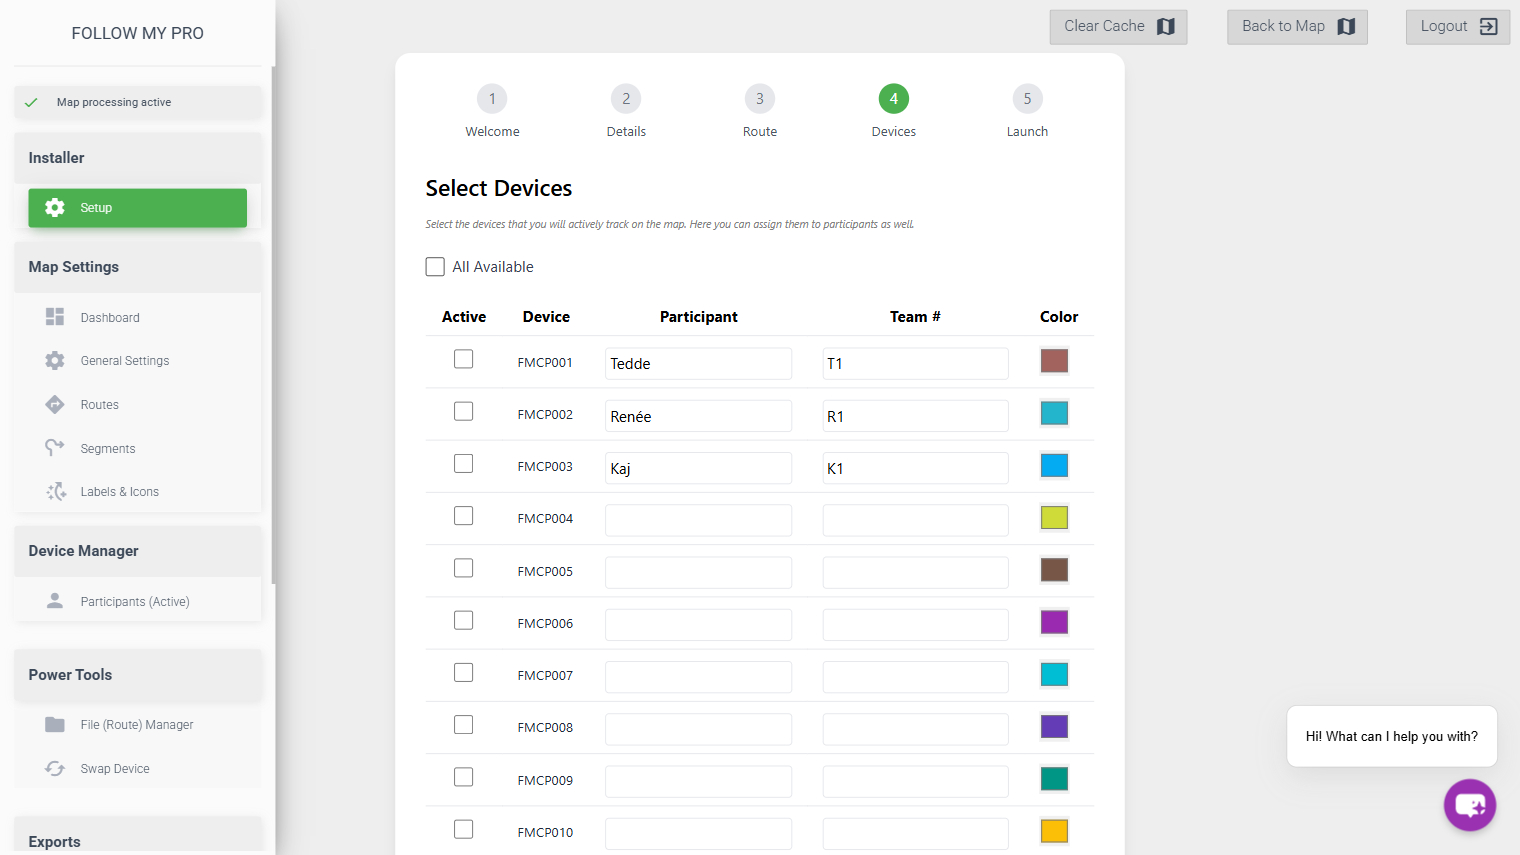
Devices
The next step is to activate and customise the devices you would like to appear on the map. All available devices will be displayed and you can activate them individually or select all. You can also assign names (previous names will remain for ease of repeating) and numbers, as well as choosing colours.
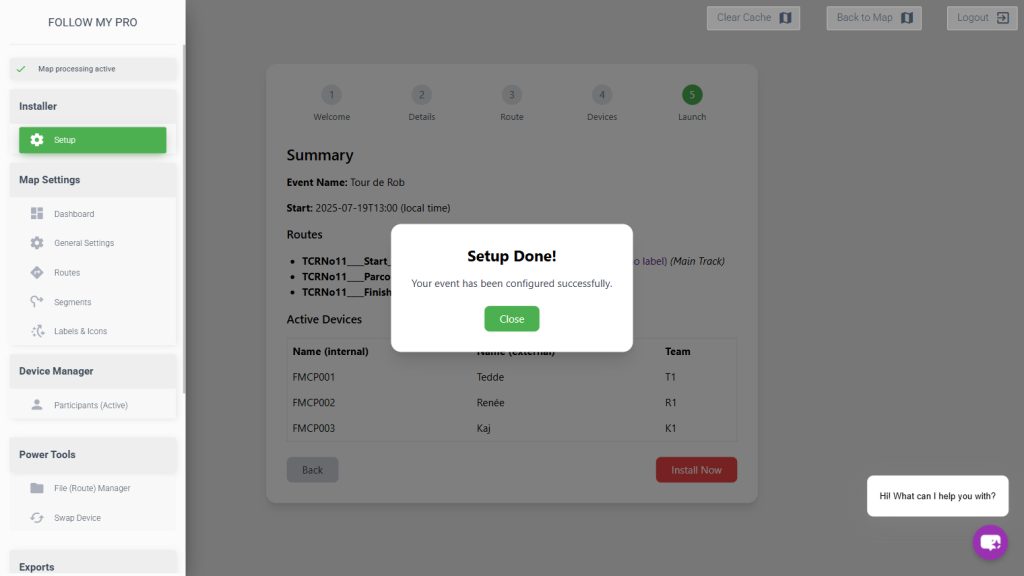
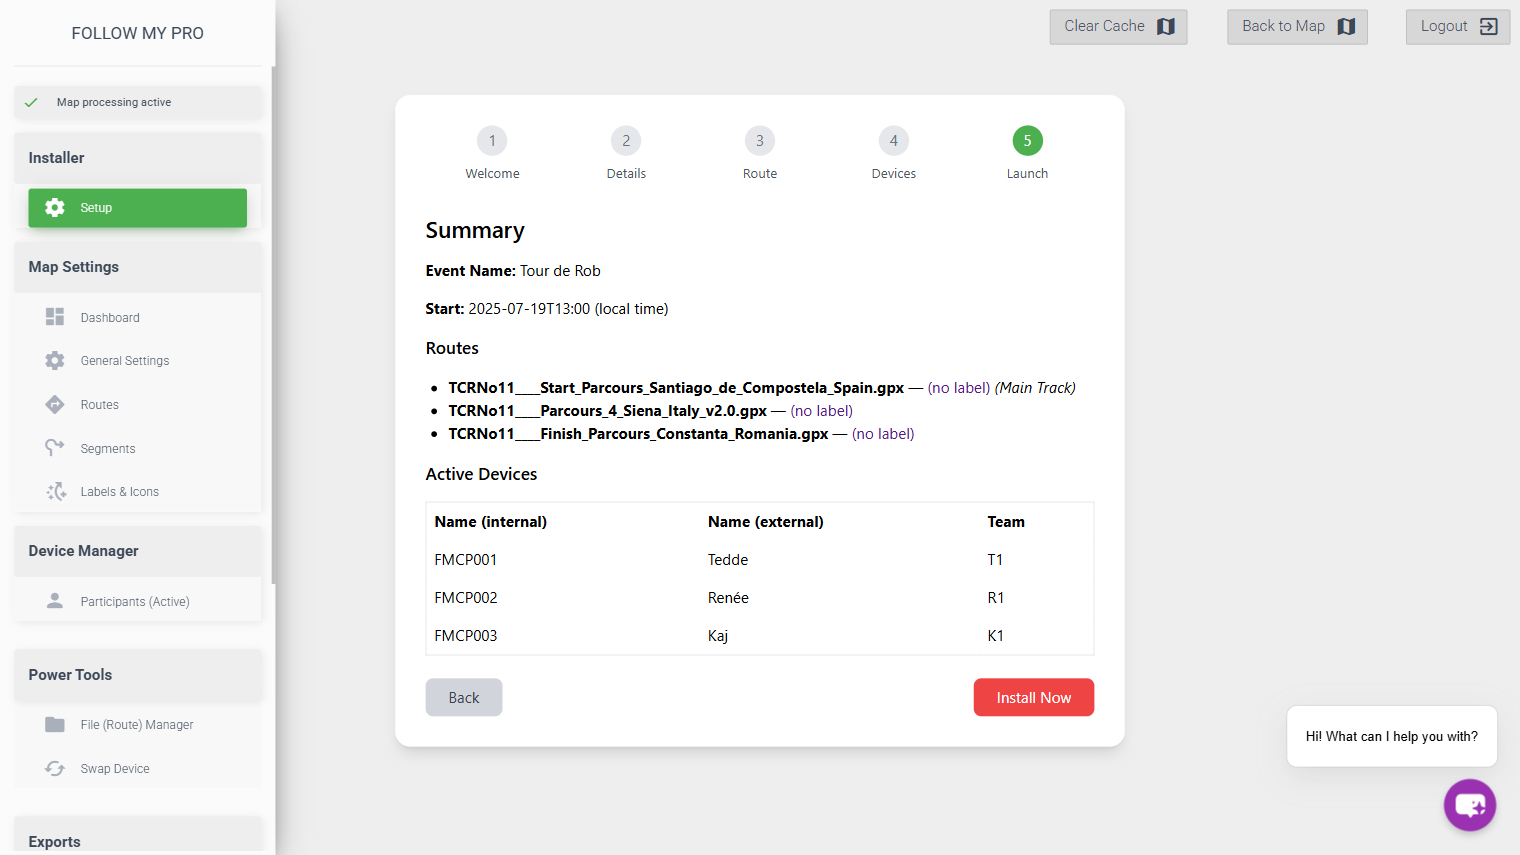
Summary & Launch
Finally, the setup wizard will show you a summary of all the data entered/uploaded. If you are happy with everything, click “Install Now”. If anything is incorrect, you can click “Back” to go and correct it.
You should then see a confirmation message letting you know that the setup is complete and the map settings have all been updated.